Soil is always prone to facing different kinds of viruses, fungi, weeds, and pests that destroy plants. The threat increases if you are using the same soil over and over again, instead of replacing it with a new one. So, to protect your plants from diseases and infestation, sterilizing the soil could be an ideal solution.
How do you sterilize soil? There are two methods of sterilizing soil – by using chemicals and by using heat. The chemical method involves using formalin, fumigants, or herbicides. On the other hand, soil heat treatment is performed either by using steam, solar energy, a microwave oven, or an ordinary oven.
Soil sterilization through chemical application can be expensive and poses health risks. No wonder that heat treatment is the more popular option. Here, using the correct temperature and heating time are the two main ingredients to success. This article serves as a step-by-step guide for all four soil heat treatments.
What Is Soil Sterilization?
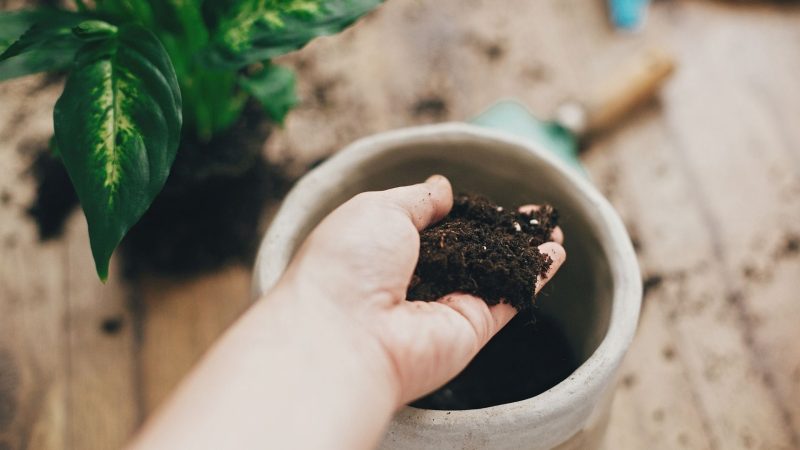
In simple words, soil sterilization is a process of disinfecting the soil before planting seeds into it. This farming technique is very effective in killing harmful pathogens, disease-causing organisms, and weeds that can wreak havoc on your lawn or garden. Aside from that, your plants will grow faster and healthier.
Is Sterilizing Soil Bad?
It is not bad to sterilize soil if you do it correctly. On the other hand, some people believe that sterilizing the soil is unnecessary and could reduce plants’ growth rate. This is because soil sterilization kills bacteria, providing huge nitrogen quantities to the plants and improving soil structure.
Also known as Plant Growth-Promoting Rhizobacteria (PGPR), Rhizobacteria enhance plant growth and protect plants from abiotic stresses and diseases. On the other hand, soil sterilization removes the contaminants in your soil. Therefore, the steps in sterilizing soil should be done very carefully.
Do I Need to Sterilize Potting Soil?
This question has been the subject of debate among gardeners and experts for years. First of all, potting soil is not the same soil you use in your garden simply because it does not contain real soil. Therefore, you should not use potting soil in your garden plants and don’t use garden soil for your plant in pots or containers.
Also called a potting mix, potting soil contains perlite, fertilizer, and organic materials such as moss or compost. Most potting soil sold in stores has already been sterilized before packaging. But to make sure, it’s better to sterilize it. On the other hand, sterilization is highly recommended if you will reuse potting soil.
Is Sterilized Soil Bad for Plants?
Sterilized soil is not bad for plants. In fact, it is very helpful in keeping plants healthy and away from diseases. Some farmers sterilize their fields once rodents have infested them. On the other hand, many commercial greenhouse owners save lots of money by soil sterilization instead of buying new potting soil.
Does Sterilizing Soil Remove Nutrients?
Sterilizing soil does not remove nutrients from the soil. In fact, applying the proper soil sterilization process can also help compost generate nutrients faster, so plants can benefit from it immediately. So far, there is no scientific study confirming that all the nutrients in the soil will be removed once you sterilize the soil.
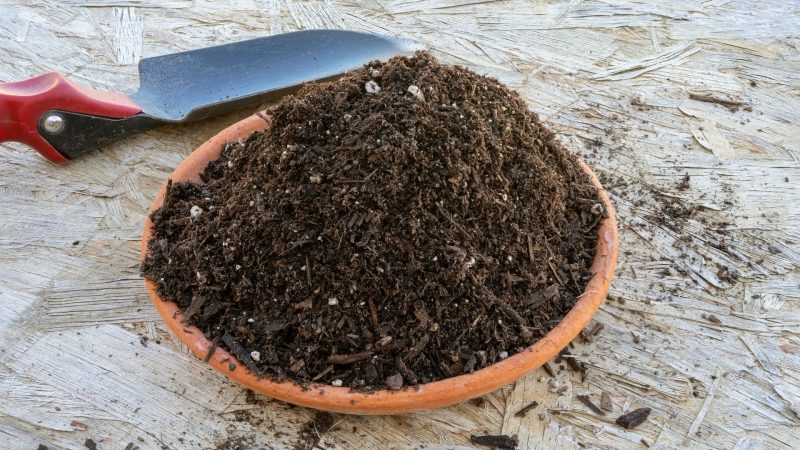
Methods for Sterilizing Soil
As mentioned above, there are four methods of sterilizing soil using heat – steam, solar energy, microwave, and oven. All of them are effective, as long as you perform them properly. Here’s a step-by-step guide for each of them:
1. Soil Sterilization Using Steam
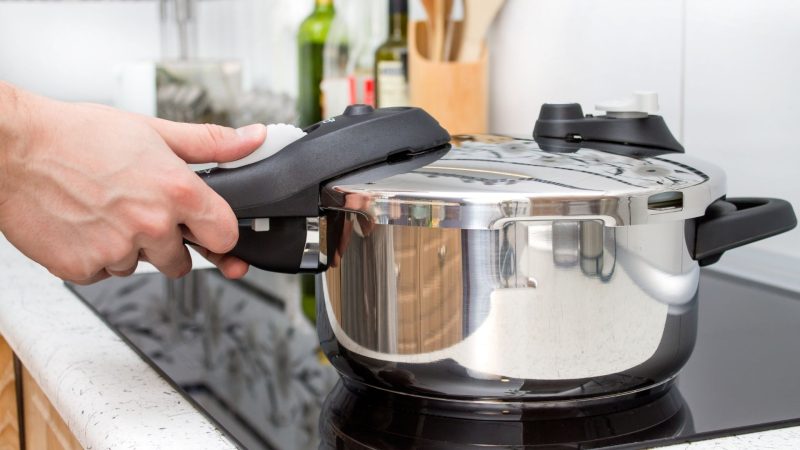
Soil steaming has a lot of variants, depending on how much soil is required for sterilization. For greenhouses and open fields, there are different equipment or pressure chambers to choose from. But for potting soil or indoor plants, you can use either a pressure cooker or a non-pressure cooker (steamer).
How to Sterilize Soil Using Steam? | A Step-by-Step Guide
For pressure cooker:
Step 1: Pour several cups of water into the pressure cooker.
Step 2: Place a heat-proof container with potting soil of not more than 10 cm (around 4 inches) on the rack above the water.
Step 3: Cover the container tightly with aluminum foil. Leave the steam valve open so that steam can still escape.
Step 4: Once the steam valve closes, heat the potting soil at 10 pounds of pressure for 15 – 30 minutes.
Step 5: Remove the container from the pressure cooker.
For non-pressure cooker:
Step 1: Pour 1 – 2 inches of water into the steam container.
Step 2: Place the rack at the bottom of the steam container.
Step 3: Fill the pan with soil on top of the rack, not more than 4 inches above the water.
Step 4: Cover the pan with aluminum foil.
Step 5: Place the lid on the container but leave it slightly open so that steam can escape.
Step 6: Boil the water for about 30 minutes.
Notes for both methods:
- Don’t remove the lid unless the pressure has already subsided.
- Don’t remove the aluminum foil unless you will already use the soil.
2. Soil Sterilization Using Solar Energy
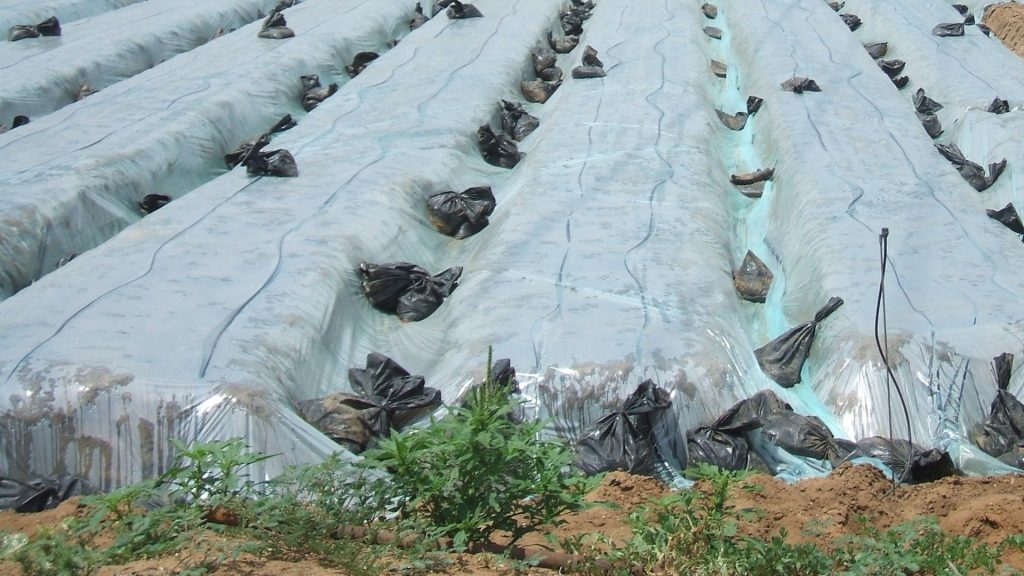
Using solar energy means using the heat from the sun and is usually used for large-scale gardens and open fields with heavy soil. On the other hand, soil solarization is not ideal for light or sandy soil because the water will drain easily. Unlike other soil sterilization processes, this technique takes longer to perform.
How to Sterilize Soil Through Solarization? | A Step-by-Step Guide
Step 1: Remove all the plants and litter from your garden.
Step 2: If you will sterilize potting soil, lay plastic on the ground and put the soil evenly on top of the plastic.
Note: The soil should be at least 6 inches away from the plastic edges.
Step 3: Irrigate (water) the soil at about 12 inches deep.
Step 4: Cover the area with clear or transparent plastic. Using dark plastic will block some of the solar energy.
Step 5: Bury the edges of the plastic edges or put some rocks on top of the edges so that that heat will be trapped properly.
Step 6: Sterilization can last for 4 – 5 weeks if the summer is in the hottest part. But if the weather is cold or cloudy, you may have to wait for 8 – 10 weeks.
3. Soil Sterilization Using Microwave
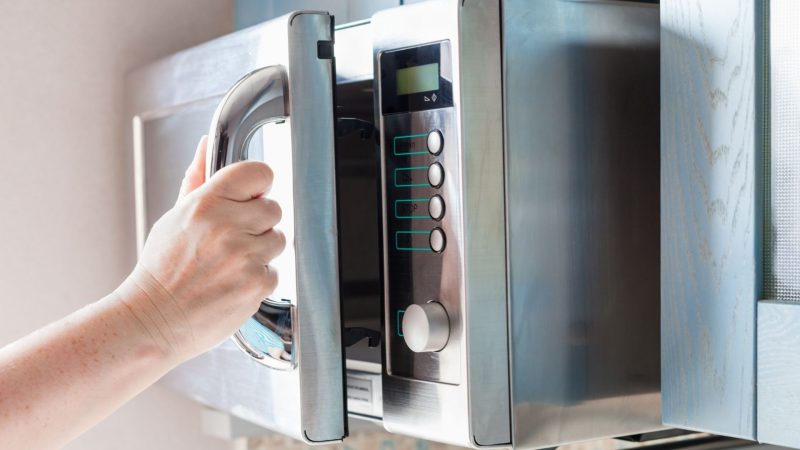
Using a microwave oven in sterilizing soil has lots of advantages over the other methods. It is faster, purely thermal, highly controllable, and leaves more nutrients for better plant growth. However, a study suggested that using a microwave oven does not sterilize the soil but rather provides significant beneficial effects.
How to Sterilize Soil in the Microwave? | A Step-by-Step Guide
Step 1: Inspect the soil carefully and make sure there is no metal, which can burn your microwave oven.
Step 2: Place about 2 pounds of moist soil in a zip-top, plastic bag, or microwavable container.
Note: The water should not be runny but damp enough to form clumps.
Step 3: Punch some small holes on the container or open it slightly so that steam can escape. This will also prevent pressure from building up.
Step 4: Place the bag or container in the middle of the microwave oven.
Step 5: Heat the soil until the temperature reaches 180 – 200°F (82 – 93°C).
Step 6: Wait for a few minutes before carefully removing the container.
Step 7: Close the container tightly and allow it to cool at room temperature before using the soil.
4. Soil Sterilization Using an Oven
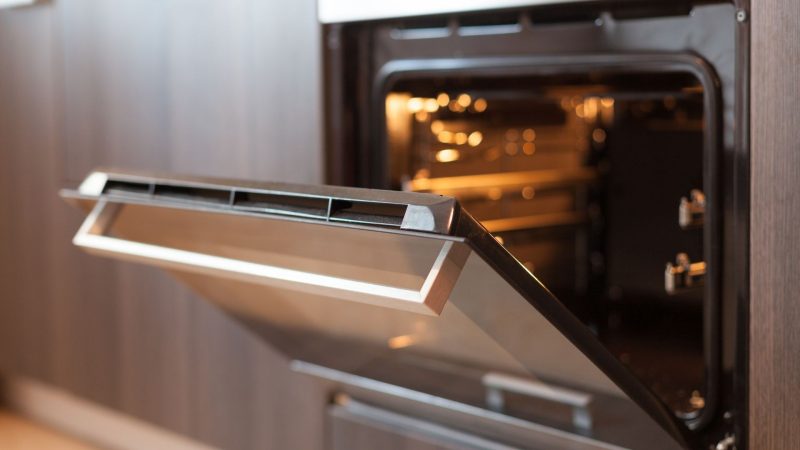
Using an oven for sterilizing soil is ideal for small batches of soil and is much safer than using steam, pouring boiling water on the soil, and using a microwave oven. However, sterilization of soil should be done outdoors (or doors and windows open) because cooked soil emits a very unpleasant odor.
How to Sterilize Soil in the Oven? | A Step-by-Step Guide
Step 1: Place soil 3 – 4 inches deep in an oven-safe container such as a metal pan.
Step 2: Add some water to the soil and mix thoroughly.
Note: The amount of water should only be enough to moisturize the soil and create steam.
Step 3: Cover the pan with foil and place a meat thermometer at the center.
Step 4: Cook the soil at 180 – 200°F (82 – 93°C) for at least 30 minutes.
Step 5: Turn off the oven and allow the soil to cool before using it.
How Do You Sterilize Potting Soil for Reuse?
As mentioned earlier, it’s better to sterilize potting soil before using it again. This is to make sure that the next set of plants that will use it will have a healthier life. Using solar energy, sterilizing potting soil can be done, but it will take 4 – 5 weeks. Alternatively, here’s how to sterilize potting soil using a microwave oven:
Step 1: Remove leaves, roots, grubs, and other plant material from the potting soil.
Step 2: Place 2 pounds of moistened potting soil inside the microwavable containers.
Step 3: Cover the containers with microwavable lids. Don’t use aluminum foils.
Step 4: Poke some holes on top of the lids so that steam can escape.
Step 5: Heat the potting soil at full power for around 90 seconds.
Step 6: After removing the containers from the microwave, cover the holes with tape.
Step 7: Make sure that the soil is completely cold before using it.
Does Boiling Water Sterilize Soil?
Boiling water can sterilize soil and can also kill the irritating weeds that harm your plants. However, be careful when pouring boiling water because it can also kill your plants. To protect your plants, avoid using boiling water if your garden is full of valuable plants. Use it only to disinfect soil before planting the seeds.
Here is a video on how to sterilize soil using boiling water:
Can You Use Bleach to Sterilize Soil?
You can use bleach to sterilize the soil, but you should take extra precautions. Most bleach products have chlorine, a strong component of salt that can kill your plants. Chlorine bleach can kill weeds but will also deplete the nutrients in your soil. Therefore, don’t use it on your soil once you have already planted the seeds.
Undiluted bleach can kill plants permanently, so you have to wait for a long time before planting seeds again. The recovery time depends on the pH level of the bleach you used. On the other hand, oxygenated bleach has no chlorine and is safer for sterilizing your soil. But still, bleach should always be your last option.
Can You Sterilize Soil With Jeyes Fluid?
You should never use Jeyes Fluid to sterilize the soil. According to the company, the product is no longer option at sterilizing soil since the European Commission (EC) regulation back in 2003. The regulation also bans Jeyes Fluid as winter plant wash, indoor cleaner, and it is not effective in killing moss.
Frequently Asked Questions
How Do You Sterilize Soil After Root Rot?
To start with, root rot mostly occurs in poorly aerated soil or when there is a lack of oxygen. This will eventually cause the plant roots to die because they will no longer receive the necessary nutrients. But don’t worry, you can still reuse the soil despite being contaminated with root rot. Here’s how to sterilize soil after root rot:
Step 1: Remove the dead plant from the soil.
Step 2: Place the rotted soil inside a cooking pot.
Step 3: Add water and mix it thoroughly with the soil.
Step 4: Boil the mixture for about 10 minutes. This is to kill bacteria that cause root rot.
Step 5: Cool the mixture until room temperature before using it again.
How Do You Fix Sterile Soil?
Despite the many advantages of soil sterilization, it may still harm beneficial microbes and insects, and soil is still susceptible to infection. Sterile soil also has no or minimal amount of Rhizobia (nitrogen-fixing bacteria), which is very essential in plant growth. To fix sterile soil, you can inoculate legumes in the soil.
Legume inoculation is the process of treating the soil with commercially prepared sources of rhizobia to solve the lack of nitrogen fixation. Legume inoculants such as Legume Powder Inoculant by Mountain Valley Seed Co. are composed of rhizobial strains that can convert essential nitrogen back into the soil for good.
How Can I Sanitize My Soil Without Baking It?
If you need to sterilize your soil, but you don’t like to bake it, there are other effective ways of soil sterilization without using an oven. You can use boiling water if the soil has no plants in it. If a plant is already present, it’s better to use solar energy. Here, the soil should be under the sun for at least 5 weeks.
Is Miracle-Gro Potting Soil Sterile?
Miracle-Gro Potting Soil is not sterile, and “sterilized” is not mentioned in the package. Therefore, it will be best if you sterilize it using a microwave oven first before using it on your indoor plants. Nevertheless, this product effectively kills harmful microorganisms but will allow the beneficial ones to survive.
How Do You Permanently Sterilize Soil?
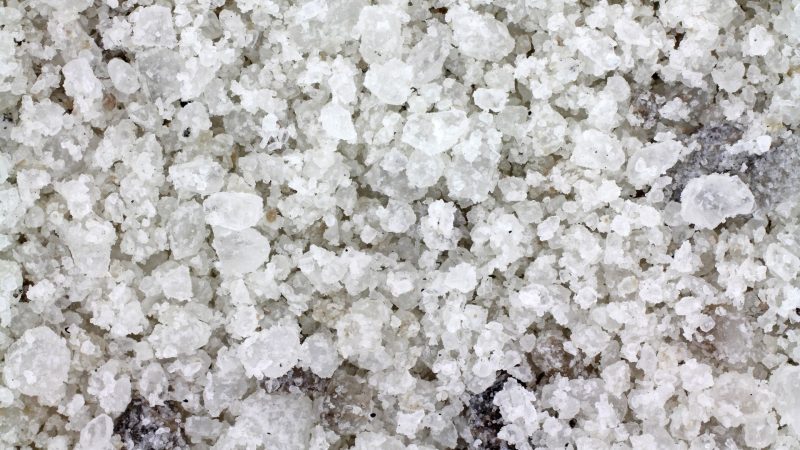
Sterilizing soil is killing all the microorganisms and bacteria in the soil so that nothing will grow on it. But while the above strategies work effectively in soil sterilization, the effect is not permanent. After some time, bacteria and weeds will be present again. So if you need to sterilize soil permanently, use rock salt.
A huge concentration of rock salt sterilizes soil by penetrating the soil. This will lead to preventing osmosis, the process of water movement from the soil to the plant roots. In effect, the plant will be dehydrated and will soon die. This is why you should not sprinkle any type of salt on your soil if you still want to use it later.
Summary
Sterilizing soil is very important for plant growth and maintaining “cleanliness” in your garden. Nonetheless, heat treatment is significantly cheaper and safer than chemical treatment. But regardless of the technique, be very careful in doing the steps. Otherwise, the soil will have a bacterial infection, and your plants will die.