Microclovers are a variety of white clover which grows less aggressively but still maintains that nitrogen-fixing ability. It is the ideal choice of grass for homeowners when they strive for the perfect, weed-free, carpet-like lawn. Additionally, it can be used as an eco-sustainable alternative to establishing lawns.
To grow a microclover lawn, rough grade the planting area, apply compost, then fine grade. Seeding of microclover should take place between late summer to early fall and should be spread evenly across the entire area before applying mulch. Finally, water for 7 to 10 days until the microclover starts sprouting.
To know more about growing a microclover lawn, its advantages and disadvantages, how to take care after establishing it, and other related information, simply read further this article.
What Is a Microclover?
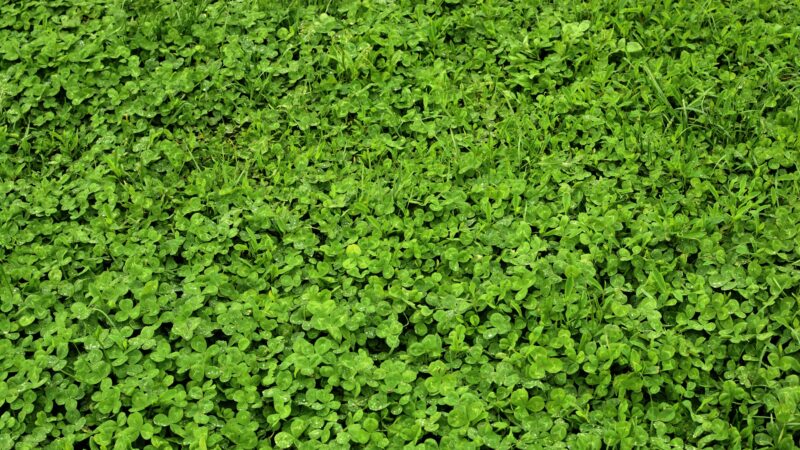
Microclover (Trifolium repens L. var. Pirouette or Pipolina) refers to a selection of the widely-grown legume crop, white clover (Trifolium repens), characterized by having fewer flowers, smaller leaves, and low-growing.
Additionally, microclover does not form any large clumps and is relatively less aggressive when growing with cool-season turfgrasses.
Pros and Cons of Microclover

Pros
- Does not form clumps, making it less competitive with desirable turfgrasses, such as the Kentucky bluegrass, in lawns, and results in a more uniform appearance when seeded appropriately.
- Able to convert atmospheric nitrogen content into organic forms of nitrogen that can be utilized by other plants due to a coating of Rhizobium bacteria, an organism that allows the plant to fix nitrogen.
- Since they can sequester natural organic nitrogen in the form of grass clippings and as the plant decays, they are also a great source of nutrients. This means that less nitrogen fertilizer is necessary.
- Helps prevent soil compaction, which subsequently aids in reducing nutrient runoff.
- Its flowers, although they are only a few, can be a good food source for bees.
- Gets competitive with weeds. So when growing as lawn grass, less herbicide is needed.
Cons
- Not suitable for every lawn.
- Not tolerant to drought, high heat, and shade.
- Requires reseeding for better resilience and long-term growth as it starts to die when its companion cool-season turfgrass becomes dormant in the summer season.
- During the winter, its top growth dies back, which leaves bare spots and can lead to erosion.
- Relatively expensive seeds, and are not readily available in retail gardening stores compared to other types of grass.
- Southern blight disease becomes an occasional problem in periods of prolonged high relative humidity and nighttime temperatures.
- Broadleaf herbicides can easily kill this plant.
- Can experience heavy flowering late into the spring until early in the summer.
- The bees this plant attracts can pose a problem for anyone in a garden owner’s household that is allergic to bee stings.
- Stains clothing easily, so it may become problematic when kids play in a microclover lawn.
How to Grow a Microclover Lawn?

1. Site Preparation
Rough grade the soil by contouring or leveling it to remove any depressions on the ground. The resulting lawn should allow surface water to be drained properly but should still be gradual enough for runoff reduction and easy maintenance.
Afterward, replace the topsoil and make sure the soil is spread evenly across the entire lawn.
Ideally, there should be 2 inches of topsoil integrated with the upper 2 to 3 inches of the subsoil to allow a nice transition between the topsoil and subsoil, as well as reduce soil compaction and increase drainage.
2. Compost Application
Modify the topsoil by placing a compost. This helps improve soil infiltration, structure, nutrient retention, and overall quality. It also helps the microclover to establish faster and improve its potential density and color.
You can choose from a variety of compost, but they are usually made of grass clippings and tree leaves, manure, biosolids, food residuals, and paper mill byproducts.
Apply a 1-inch layer of compost onto the soil surface, then incorporate 4 to 6 inches into the soil depth. It should be thoroughly mixed with the soil and not form any clumps. Till sufficiently to break the soil.
3. Final Soil Preparation
This involves fine grading the soil by smoothing and firming its surface. Stones should be removed, and any remaining depressions should be filled with soil. This can be done through hand raking, harrows, soil blades, steel mats, landscape rakes, and brushes.
4. Seeding
Plant microclover between late in the summer season to early fall for optimum growth. Distribute the seeds evenly across the prepared soil using a spreader.
Apply starter fertilizer immediately before or after seeding at a rate of half to 1 pound per 1,000 square feet. Afterward, use a roller to press the seeds onto the entire area or sow by hand or using a broadcast spreader.
How to Establish Microclover Lawn?
After seeding, apply mulch to aid in the establishment of microclover and also to ensure that it makes a more uniform spread. It is particularly essential to mulch on sloped areas due to higher chances of erosion. Straw mulch is the most commonly used option.
Afterward, water the area for the first 7 to 10 days since the soil needs to stay moist enough until the plant has sprouted. Germination usually happens within 7 to 14 days under the right moisture and temperature conditions.
How to Care for a Microclover Lawn?

Once the microclover has established itself, the next 4 to 8 weeks are critical for its survival. As the lawn matures, watering and mowing should be done regularly to increase the microclover’s resilience.
Here are the following steps you should do to ensure the growth of a newly-established microclover lawn:
- Watering. Clover root systems are generally shallow and delicate, which means they can’t survive moisture stress. The lawn’s soil should be wet but not excessively so. This is achieved by light but frequent irrigation. Reduce irrigation during cool-overcast conditions, rainy periods, and mulched seedbeds.
- Mowing. Mow regularly and make sure leaf tissue is removed frequently. Use a lightweight mower when the grass is no more than a third higher than your desired cutting height. The best mowing height would be around 3 to 3.5 inches.
- Fertilizing. Usually, microclover lawns don’t need any additional fertilizer due to their natural nitrogen-fixing capabilities. However, if the starter fertilizer didn’t work to rapidly grow the new lawn, you can apply half a pound of nitrogen per 1,000 square feet 4 to 8 weeks after you applied the starter fertilizer.
- Controlling weeds. If you’re growing microclover along with other turfgrass, which is considered a highly probable scenario, many of the herbicides you use to control broadleaf weeds will also injure or worse, kill microclover. Minimize the rate of herbicide applications you make or remove the weeds culturally instead.
- Controlling traffic. Avoid stepping on or driving onto the newly-established lawn until the microclover is well-rooted and has already been mowed several times. Microclover can be uprooted or bruised easily during their early stages of growth.
Frequently Asked Questions
How Much Does a Microclover Cost?
As of this writing, 1 pound of microclover seeds can cost $35 to $40 per pound. To establish a microclover lawn, you will need 1 to 2 pounds of seeds per 1,000 square feet of planting area. Depending on the size of your lawn, you would have to purchase about $150 to $1,000 of seeds.
Where to Grow Microclover?
They should be grown under direct sunlight with little to no shade on well-drained clay or sandy soil, ideally with a pH level between 6.0 to 7.0.
When Should I Plant a Microclover?
The best time to achieve turf-type tall fescue is somewhere in the late summer season to early in the fall season.
You can also seed in late fall or during the spring, but you would have to take extra care for weather-related problems such as drought and heat, as well as weed competition.
How Long Does Microclover Take to Grow?
After seeding, germination begins around 7 to 14 days under the right environmental conditions, during which the microclover starts to sprout from its seeds.
How Tall Does Microclover Grow?
It grows an average of 3 to 4 inches tall but can reach a height of 6 inches when left unattended. However, it is recommended to mow them at a height of 3 inches to encourage a good spread across the lawn.
Will Microclover Grow in the Shade?
Microclover will start struggling for survival as they are poorly tolerant to shade. Hence, they shouldn’t be grown under trees or on very shady sites.
List of Sources
Microclovers Making a Comeback as Lawns Grow in Biodiversity